

Showing posts with label DIY. Show all posts
Showing posts with label DIY. Show all posts
16 July 2012
ATTEMPT #2
08 July 2012
NAILS

What a great shot of my cuticles...In any case, I've always been someone who's always liked painting their nails. The only problem with nail painting is the two-day later chipping that we've all endured. Then I found out about Shellac nails and tried it for the first time a few weeks ago - it's amazing! The polish lasts at least three weeks and hardly ever chips! I've done it three times now - first was the light pink above, then neon yellow (awesome), and now I have a coral pink color. I'm usually not one for manicures, but I love how I don't have to worry about them chipping when I'm cleaning or weeding. Now I just have to wait for the price of at-home Shellac kits to go down so I can justify doing it all on my own - a good investment, right?
05 April 2012
An Easy DIY Gift
I know that it's already April and I am totally behind on posting this, but I just wanted to share with you part of the gift I gave to my sister for her birthday. She told me that for her birthday she wanted bath salts or bubble bath. I tried looking at some online or other places but decided that it would be better if she could pick out the one she wanted and then I would pay for it because she is so picking about scents (as am I...). So on her birthday, I took her to Bath & Body Works, which seemed like a good candidate for bath salts, but they had hardly any options! It was so disappointing! So we left B&BW disappointed, and I still needed to get something for my sister. I thought about it for a while and decided that I would maybe just try to make my own - how hard could it be after all, right? Turns out, not too hard at all!

These are all the ingredients you need, and it's super simple to put together!
First measure out a cup of salt, either sea salt or epsom salt, into a bowl. Then add a tablespoon or two of baking soda to the salt and mix. Next, add 1/4-1/2 teaspoon of essential oil - I used lavender for one of the jars, and then a mix of tea tree oil and peppermint for the other. If you want the salt to look all pretty, then you can add a couple of drops of food coloring to the salt. Just don't go toooo crazy with the food coloring, or else it might dye the person's skin while they are bathing...Then mix super well until all of the color is evenly distributed and put into a cute container, like this little mini mason jar or something. Tie a little raffia ribbon around, label the scent on the top, and you are done! It was so much fun to make, and I could customize the scents and everything just how I wanted. You do have to have your own essential oils, which may be a little pricey, but they last forever, and you can get the same ones that I did right here on Amazon. And then you can give everyone you know bath salts for the rest of your life! Woohoo!


These are all the ingredients you need, and it's super simple to put together!
First measure out a cup of salt, either sea salt or epsom salt, into a bowl. Then add a tablespoon or two of baking soda to the salt and mix. Next, add 1/4-1/2 teaspoon of essential oil - I used lavender for one of the jars, and then a mix of tea tree oil and peppermint for the other. If you want the salt to look all pretty, then you can add a couple of drops of food coloring to the salt. Just don't go toooo crazy with the food coloring, or else it might dye the person's skin while they are bathing...Then mix super well until all of the color is evenly distributed and put into a cute container, like this little mini mason jar or something. Tie a little raffia ribbon around, label the scent on the top, and you are done! It was so much fun to make, and I could customize the scents and everything just how I wanted. You do have to have your own essential oils, which may be a little pricey, but they last forever, and you can get the same ones that I did right here on Amazon. And then you can give everyone you know bath salts for the rest of your life! Woohoo!

10 August 2011
Day 16 -- Mason Jars

Yeah yeah yeah. I get in the habit of blogging a bunch, and then stop. Please don't think that I am quitting out on you now, but I have two very good reasons why I have not been blogging lately:
1. It came. Yes. The new computer. But I am not permitted to go into any detail here because my mother is convinced that someone will find my blog, stalk me, and then steal my computer. And I like my computer a lot. So I do not want it stolen.
2. I have been working again. Uggh, I know, right? Swim lessons are back on, and they are actually kind of fun this session, so it's not too bad. I have also been doing a heck of a lot of research lately, since I found out that my IACUC application was due on the 10th, and I thought it wasn't due until the 20th, but we managed to get it in on time and I complete all 5 hours of safety training (snooze fest galore) and I will be able to start my research as soon as we get our fish back from Panama. Yay!

I know this shot isn't exactly the most artistically dynamic or correct, but I felt like it looked quite summery so I wanted to include it! So, these mason jars are the result of my random Pinterest perusing and the ridiculous amount of odds and ends in my craft box and my love of hot glue guns and buttons. If you were wondering why there are clear strings glued on the top, it is because they were originally intended to be hung from the tree in our backyard. I wanted to take a picture of them from the tree of course, but I waited until wayyy too late at night, so this was all I got. I apologize, but you get the idea.

04 August 2011
Sorry I've Been Blogging So Much Lately...
But when I am off work this week, I just don't have that much else to do! And everything I do have time to do, I just want to share with all of you here on the blog :)
ANYWAY, so yesterday, I decided to do a quick little home improvement project! It was one that I blogged about a little while ago, as you may remember. I was so excited to get started on it, that I completely forgot to take a BEFORE picture. So you are just going to have to use your imagination here people.
Imagine this: a boring, typical old three panel medicine cabinet with two well-used, off-white, partially unfinished shelves and an off-white background.
BORING!
After:


SO fun and SO easy! I love the pop of color I get every time I go to brush my teeth now, it makes it so fun! And the whole thing probably took me fifteen minutes, at most. It was awesome.
All you have to do is get a few sheets of scrapbook paper (I used four) and some scissors/paper cutter and tape! First, take out the shelves. This may be tricky, but I promise you can do it! Unless they are nailed in of course. Then you measure out your paper to make it fit, cutting pieces as needed. I recommend purchasing paper that has a pattern that will easily overlap. Next, tape those pieces of paper on to the shelf, using a small piece of rolled tape in each corner. Then put the shelves back in, and you are done! Was that easy or what?!
I also painted the shelves with white paint to make them look a little newer, which is probably why this took me 15 minutes instead of 5. Seriously, this is probably the easiest DIY home project ever, and I totally recommend it!
ANYWAY, so yesterday, I decided to do a quick little home improvement project! It was one that I blogged about a little while ago, as you may remember. I was so excited to get started on it, that I completely forgot to take a BEFORE picture. So you are just going to have to use your imagination here people.
Imagine this: a boring, typical old three panel medicine cabinet with two well-used, off-white, partially unfinished shelves and an off-white background.
BORING!
After:

And with all of our stuff in it...
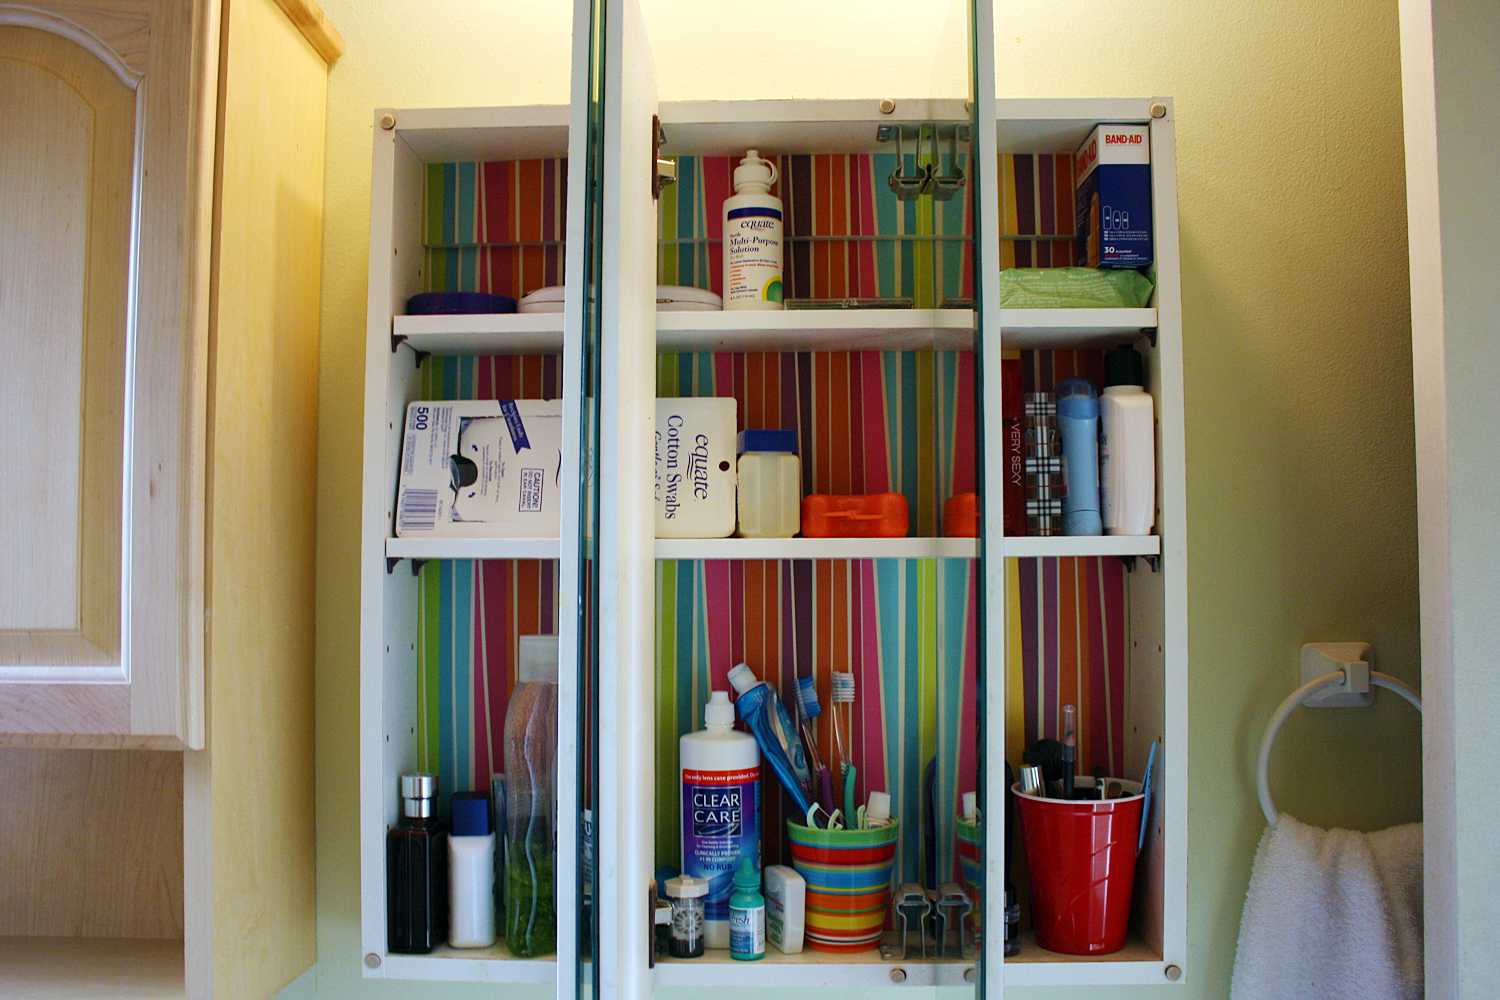
SO fun and SO easy! I love the pop of color I get every time I go to brush my teeth now, it makes it so fun! And the whole thing probably took me fifteen minutes, at most. It was awesome.
All you have to do is get a few sheets of scrapbook paper (I used four) and some scissors/paper cutter and tape! First, take out the shelves. This may be tricky, but I promise you can do it! Unless they are nailed in of course. Then you measure out your paper to make it fit, cutting pieces as needed. I recommend purchasing paper that has a pattern that will easily overlap. Next, tape those pieces of paper on to the shelf, using a small piece of rolled tape in each corner. Then put the shelves back in, and you are done! Was that easy or what?!
I also painted the shelves with white paint to make them look a little newer, which is probably why this took me 15 minutes instead of 5. Seriously, this is probably the easiest DIY home project ever, and I totally recommend it!
25 May 2011
How Pinteresting....

I finally have a Pinterest! YAY!
For those of you who don't know what Pinterest is all about, please continue to read :) So I don't know about you, but I am a "bookmarking" maniac. I feel like I always have to bookmark a page that has something cool on it, and if I don't, then I likely have lost that interesting tidbit or fun DIY idea or awesome recipe to the Internet forever. This is why I have like over 50 bookmarks on my Chrome browser, and probably why my Internet takes forrreeevvvverrrrr to load. Solution? Pinterest! Pinterest is a place where you can "pin" different sites and organize them into categories by simpling clicking on a button when you are on the desired page. Other people can view your pins, re-pin them, and get inspired! I love the look of Pinterest, and feel like this will be a wonderful and totally fun way to keep all of my ideas and inspirations in one place.
If you have a Pinterest, let me know and follow me! If you would like an invitation to Pinterest, also let me know and I will hook you up! It's much easier when you get an invite from someone you know...it took me like three weeks to get accepted!
Let the pinning begin!
(yes I'm a total nerd)
24 May 2011
Crafty Inspiration
Here are some glimpses at some DIY/craft projects I've been interested in/completed recently!

Remember that chevron rug that I was adoring over at UO? How about a tutorial on how to make my own! Definitely want to give this a try as soon as we move into our new place.

An adorable button monogram that I made for an upcoming baby shower! (I would post a photo of my own, but I don't want to give away the surprise!)

Remember the pompoms I had at my wedding? I think these would be such a cute soft little addition to my kitchen or who knows where...really I just think they are adorable but have no idea where I would put them...

I clearly have a thing for hanging orbs. I would put a few of these outside by our new back "patio"/porch thing to create a lovely romantic summer atmosphere.
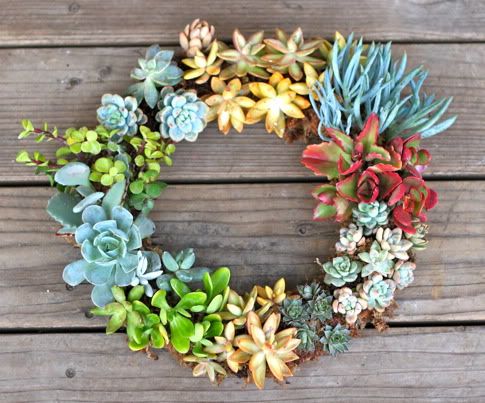
How incredibly gorgeous would this unique wreath look on our front door?? And the best part is that it is completely DIY and alive! I may need to start taking more walks to local parks and searching for succulents! (anyone know of any good places?)
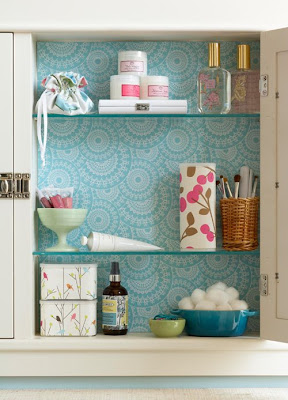
A super super simple idea to brighten up an everyday, usually boring space. This easy DIY will probably be one of my first projects in our new place!
Subscribe to:
Posts (Atom)